Creating and managing projects: managers, access, billability settings
The Projects section lets you create and manage projects, assign clients and members, set billability rules, and review tracked time, cost, and revenue.
Workspace Owners and Admins have full access to projects and can create, manage, and configure all settings.
Managers can view project data for assigned projects, but they do not have access to financial data.
Users can view the project name and the total time they personally spent on assigned projects.
View projects
Open Projects from the left sidebar.
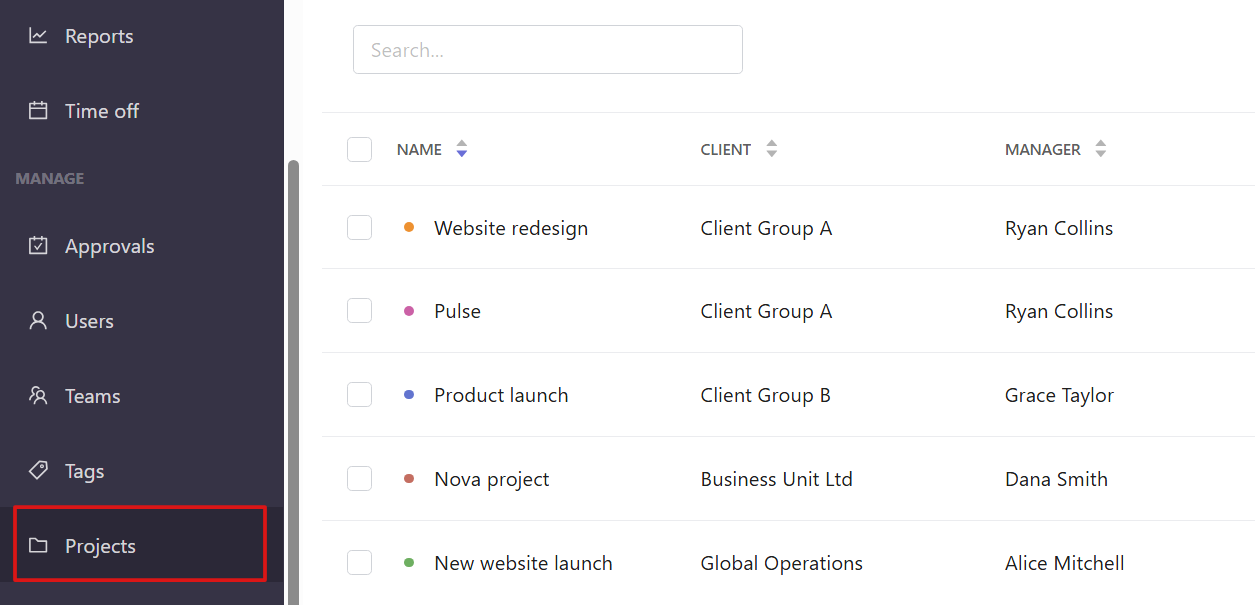
The main page shows all active projects with the following details:
- Project name
- Connected client
- Project manager
- Total tracked time
- Cost
- Revenue
Use the search bar to find a project by project name or client name. You can also filter the list by project name, client, time, cost, and revenue.
Create a project
Step 1
Click Add project in the upper-right corner of the Projects page.
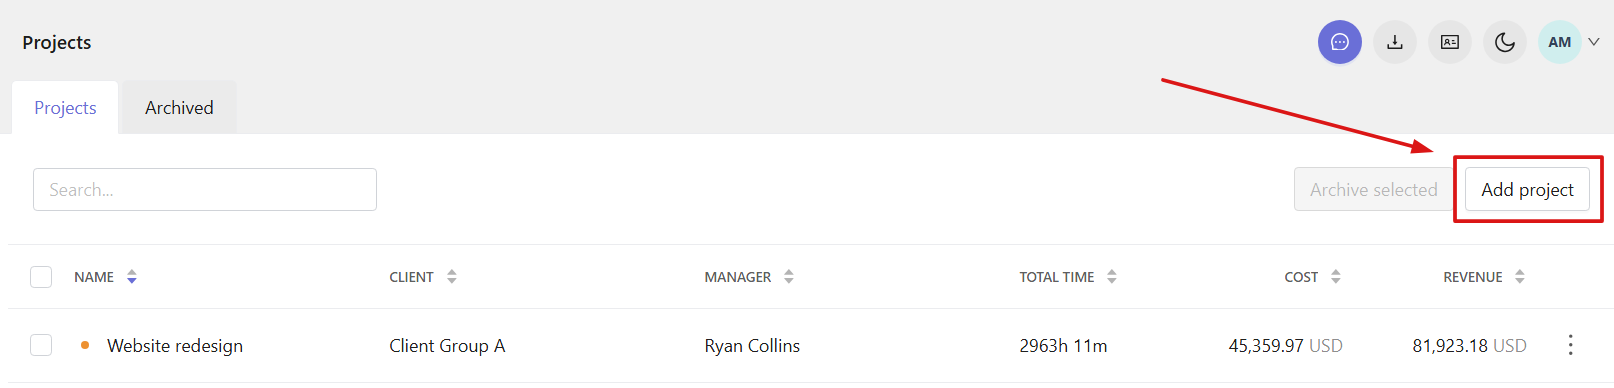
Step 2
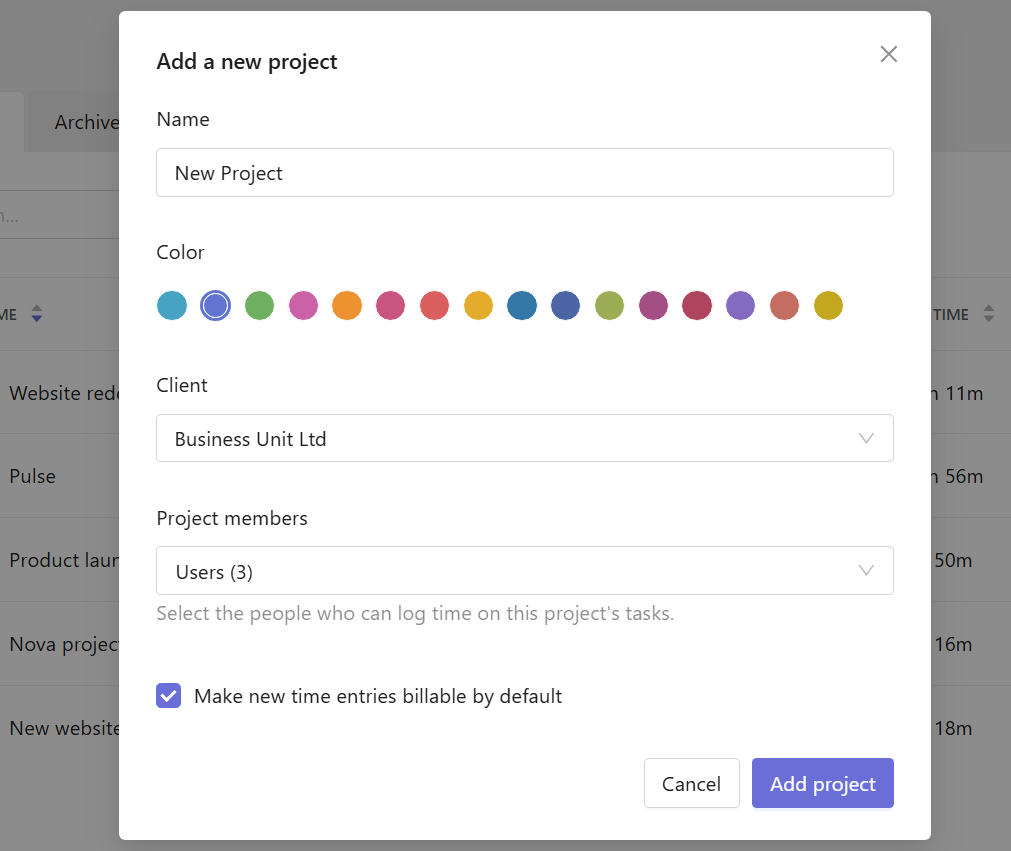
In the window that opens, set up the project:
- Enter project name
- Choose project color
- Select connected client
- Add project members
- Enable "Make new time entries billable by default" if needed
Step 3
Click Add project.
The project appears in the Projects list and becomes available for time tracking.
View and edit projects
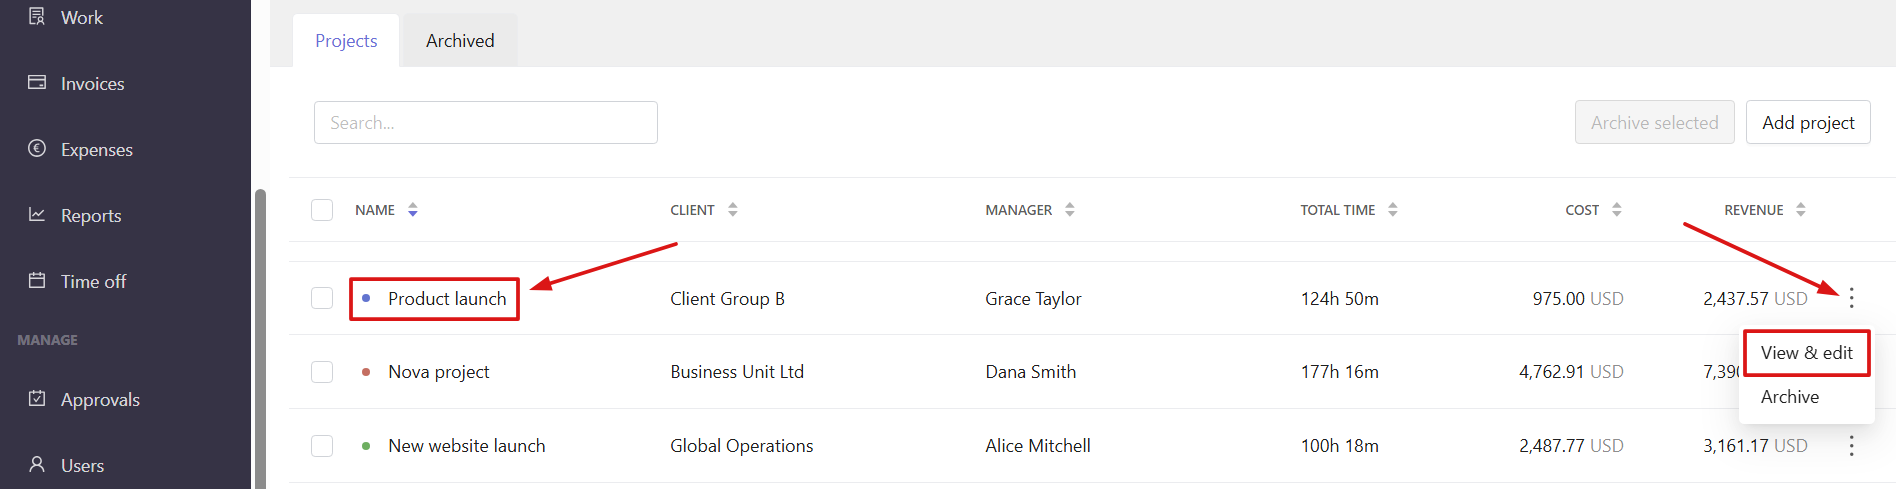
Click the project name to open project details. You can also click the three-dot menu next to a project and select View & edit.
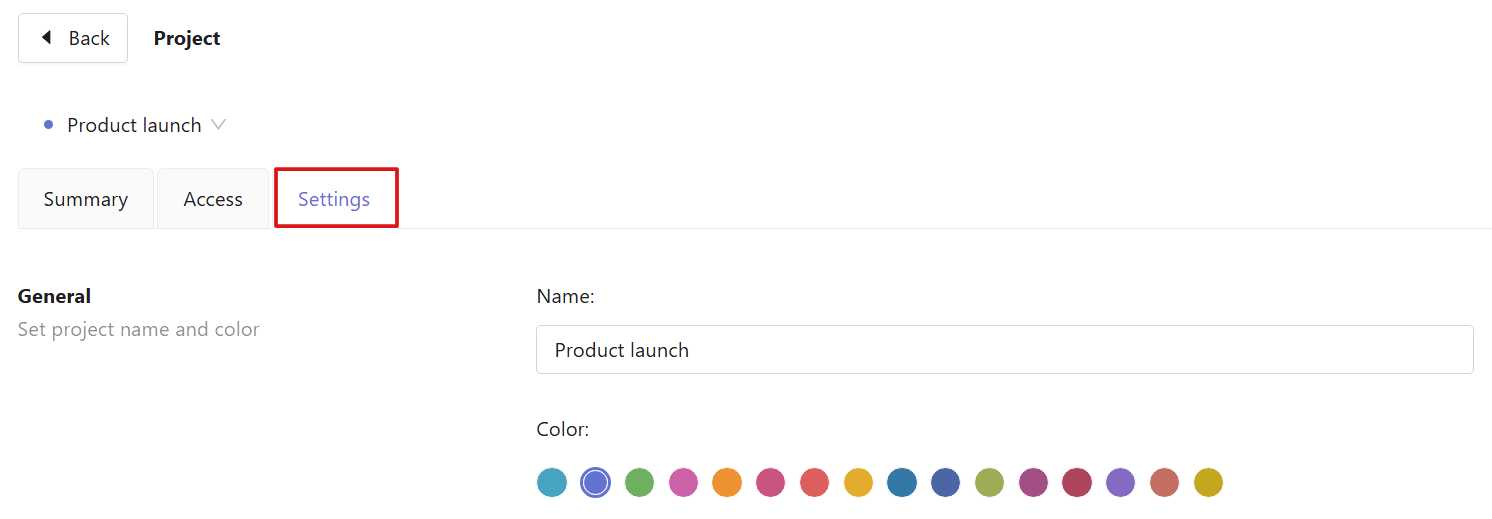
In the new window, open the Settings tab to update project configuration:
- Change project name and color
- Change connected client
- Set or adjust billability rules
- Assign or change project manager
- Add or update project notes
Manage project access
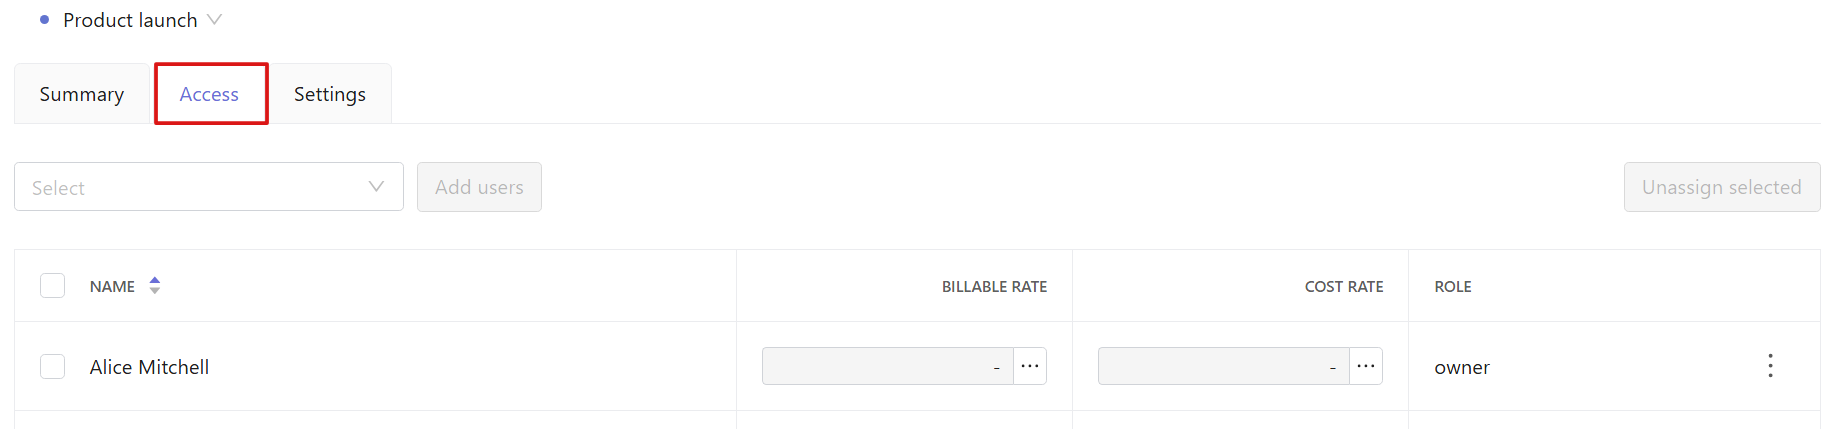
Open the Access tab to manage project access.
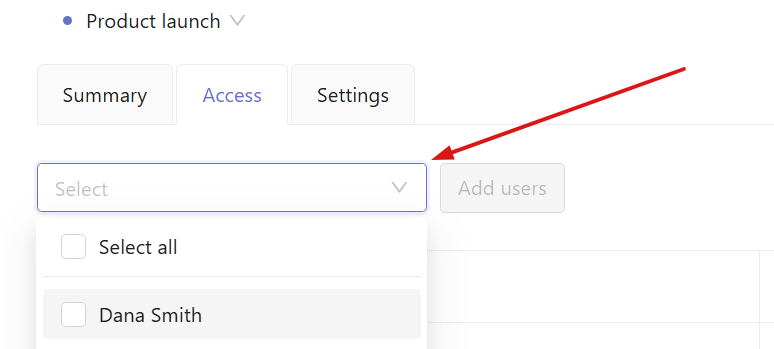
You can add users to a project by clicking the Select field in the upper-left corner. From the list, choose team members and click Add users. The selected users appear in the project and can start tracking time immediately.
To remove users, click the three-dot menu next to a user and select Unassign.
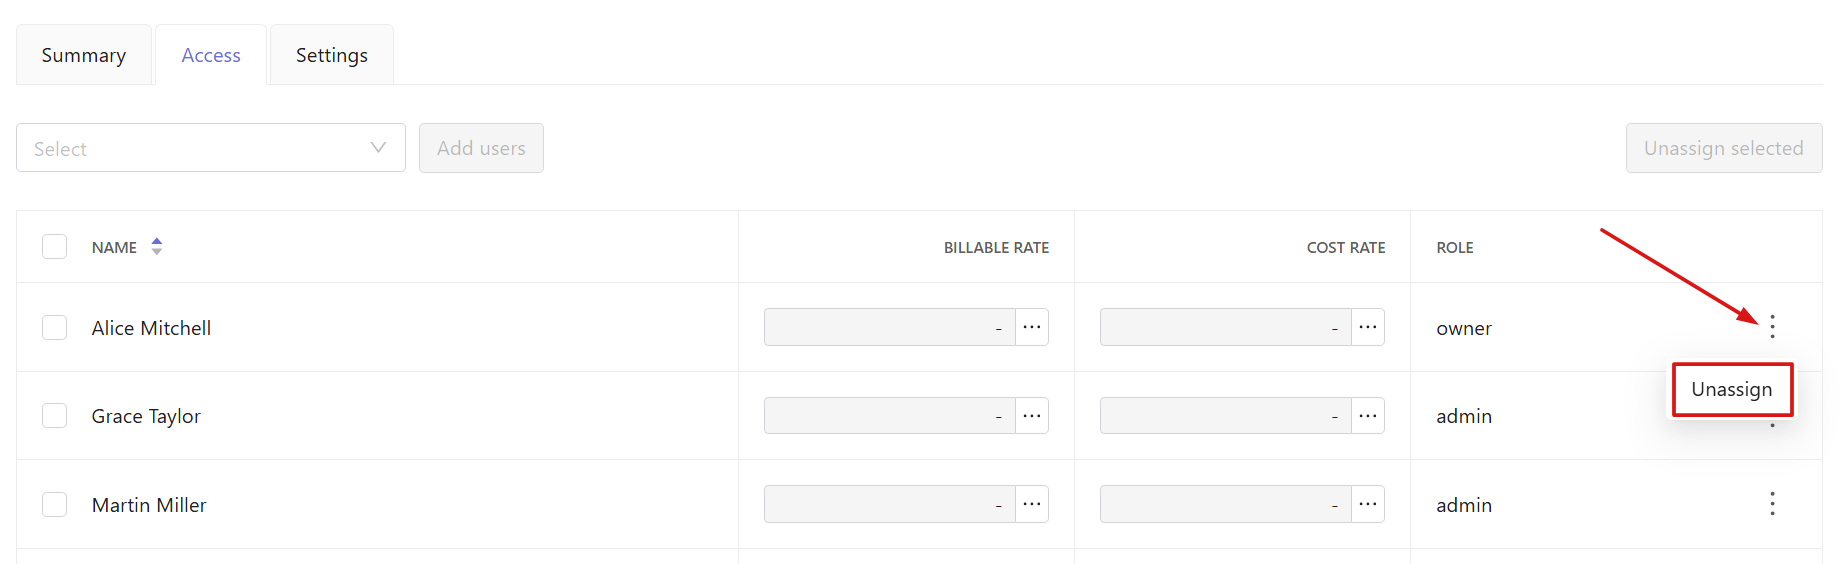
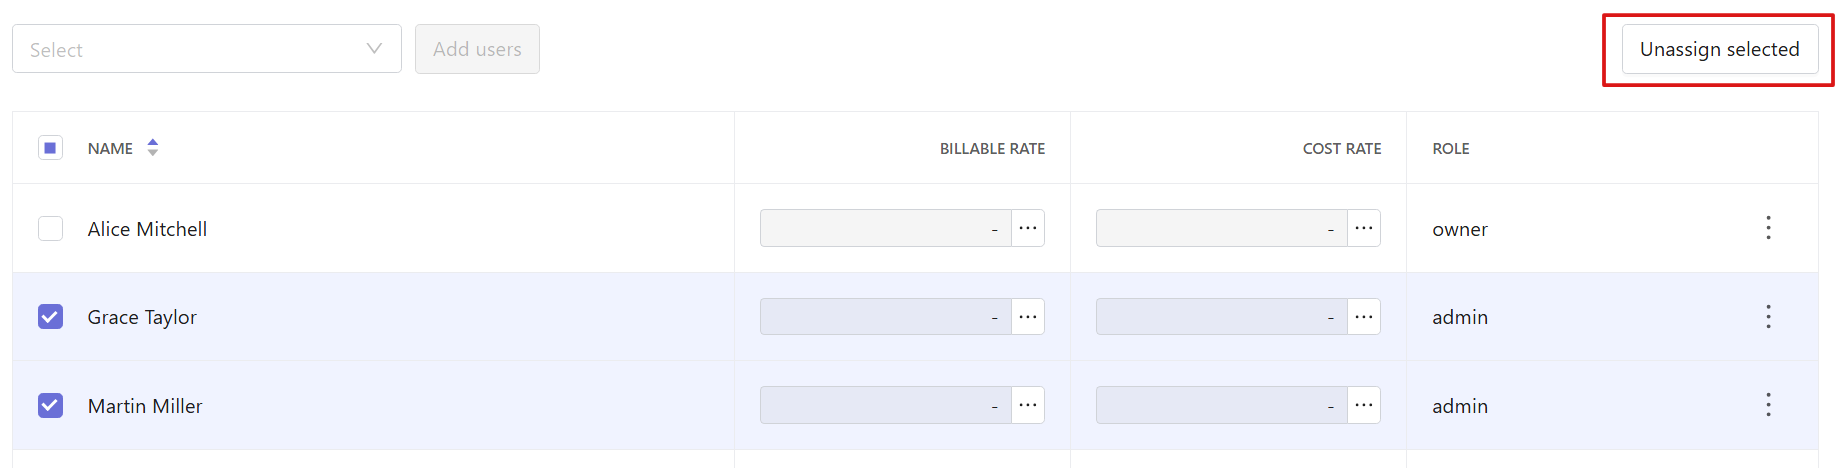
You can also select multiple users using checkboxes and click Unassign selected.
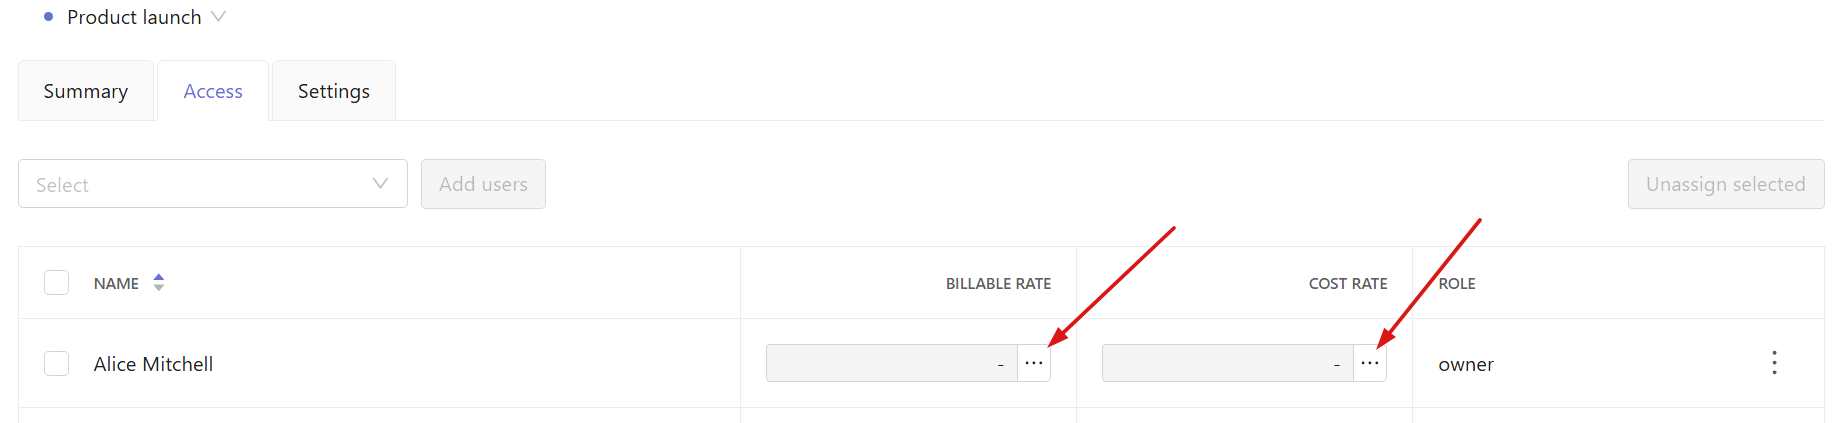
Set or change rates in the Billable rate and Cost rate columns.
Click the three-dot menu in the rate column to open rate settings.
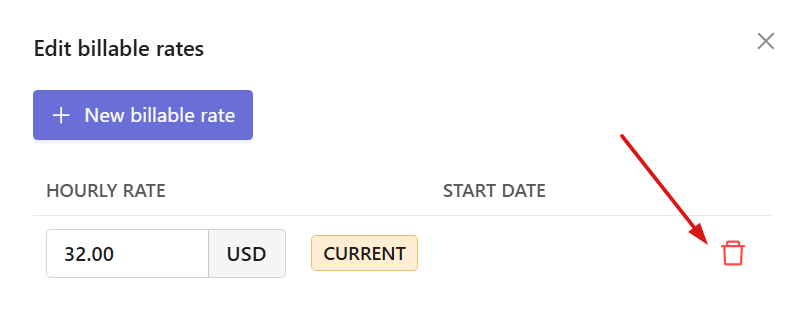
In the window that opens, you can:
- Set the current rate
- View historical rates
- View future rates
- Delete rates
To delete a rate, click the trash icon next to it.
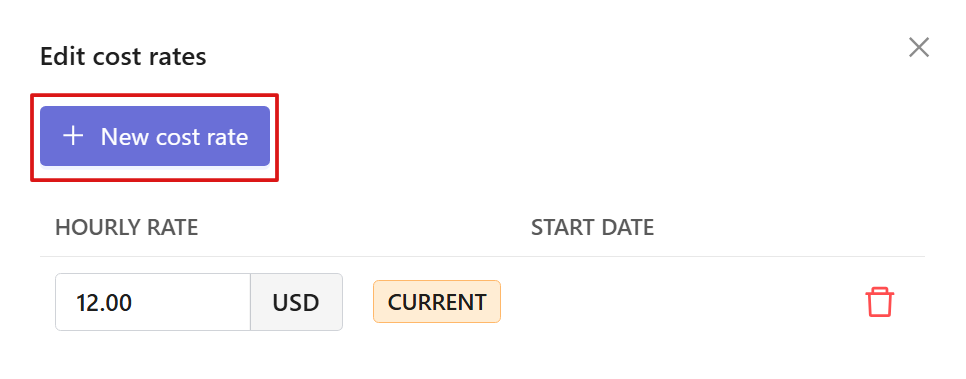
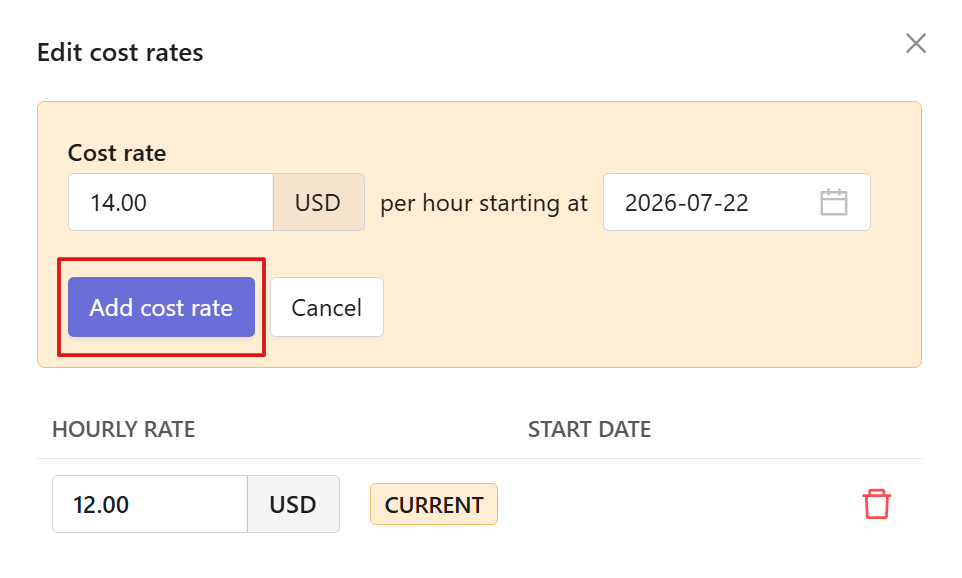
To add a new rate, click New billable rate / New cost rate, set the rate and its start date, then click Add billable rate / Add cost rate.
Archive projects
Click the three-dot menu next to a project and select Archive.
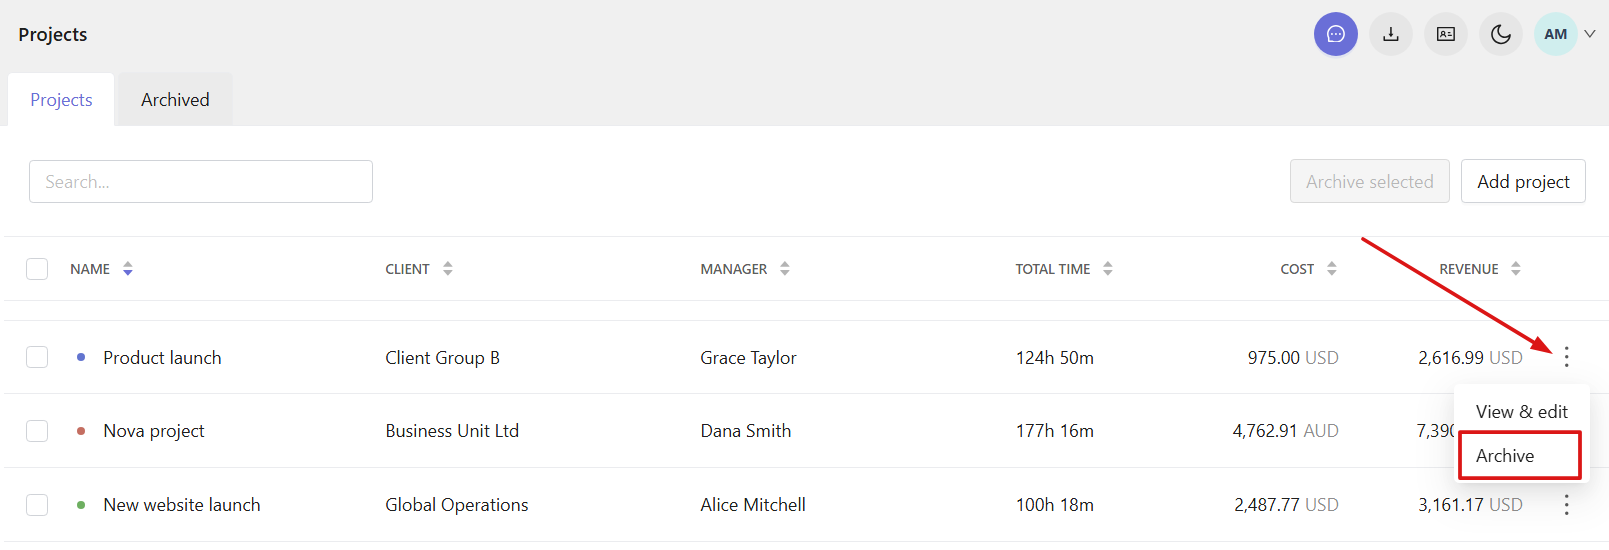
Traqq moves the project to the Archived tab. After that, you can no longer track time for the project. Archived projects remain available for viewing historical time and project data.
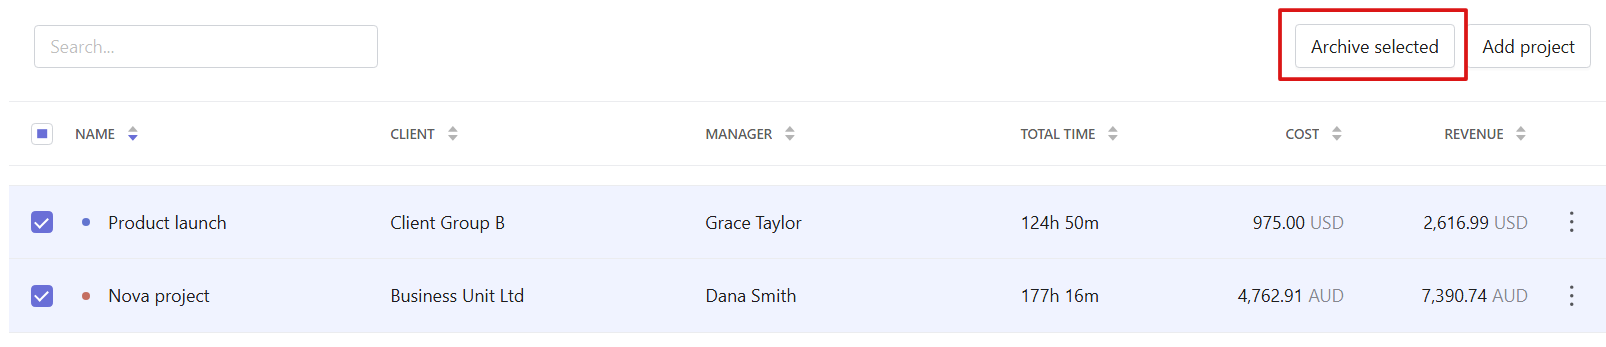
You can also archive several projects at once. Select the checkboxes next to the projects you want to archive and click Archive selected.
-
Restore projects
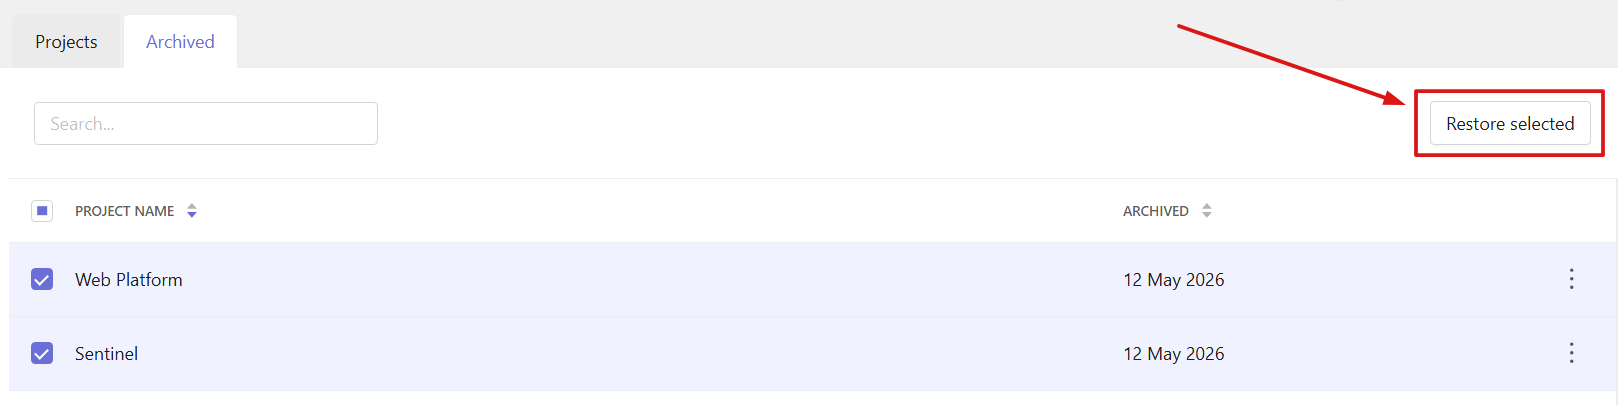
- You can restore a project to make it active again. In the Archived tab, click the three-dot menu next to a project and select Restore.
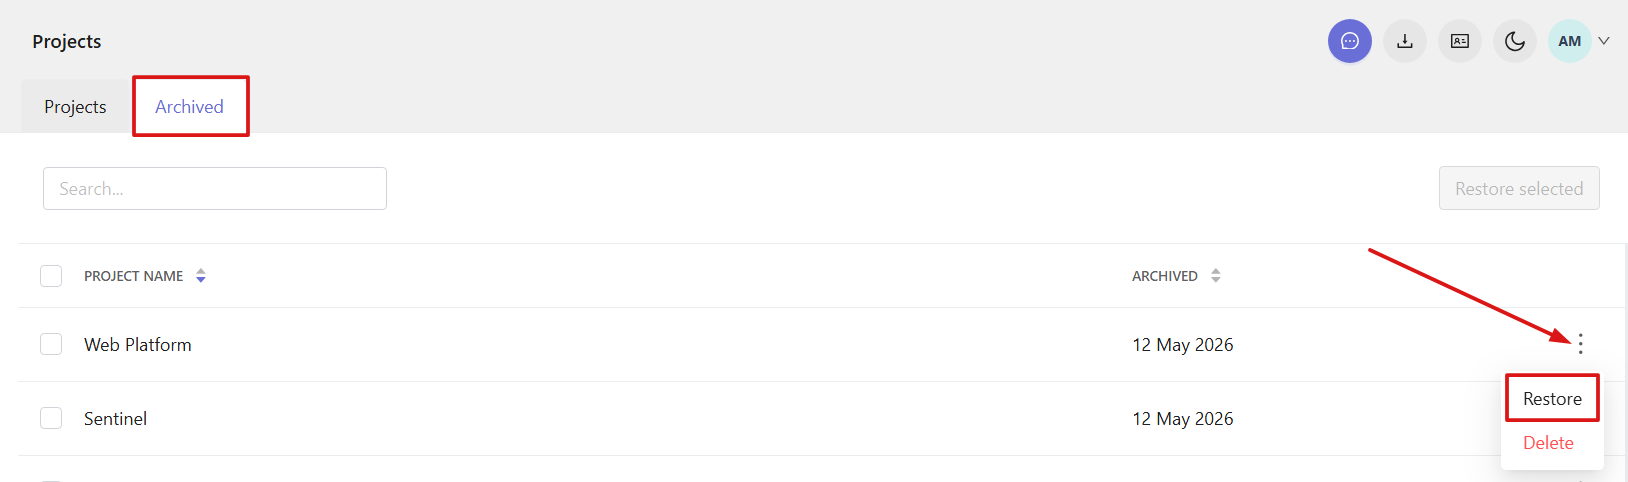
- Traqq moves the project back to the Projects tab and you can track time for it again.
- You can also select one or more projects using the checkboxes, then click Restore selected.
Delete projects
You can delete projects only from the Archived tab.
Click the three-dot menu next to a project and select Delete.
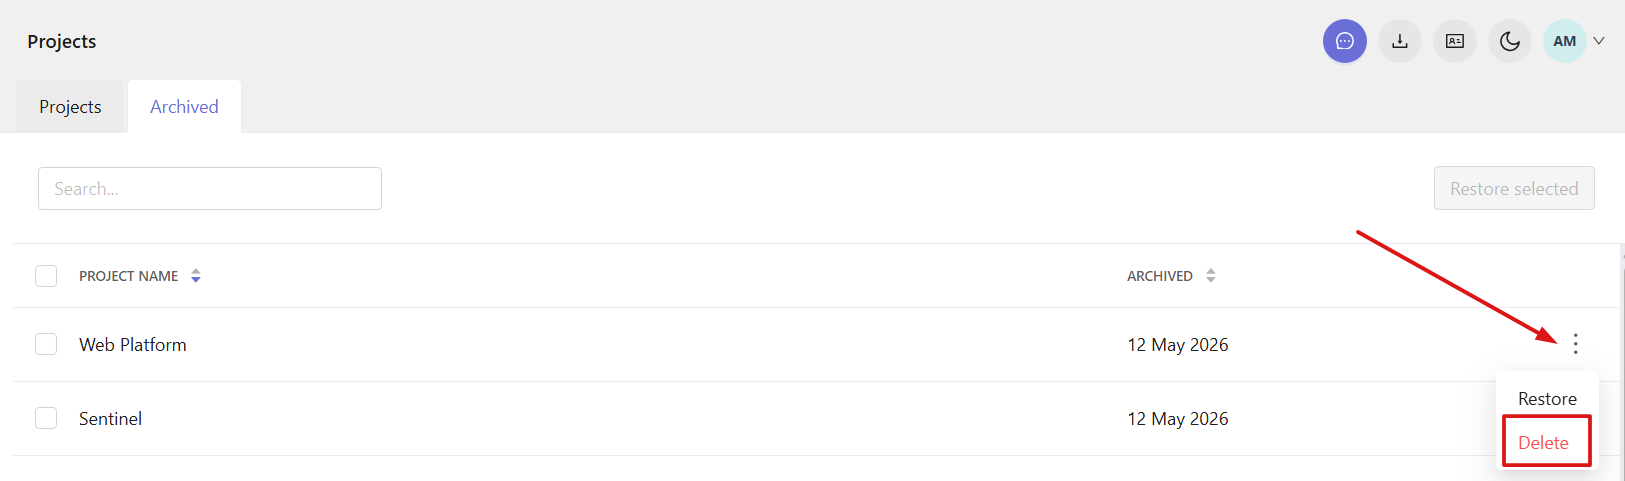
Warning: Permanent deletion removes time entries, expenses, timesheets, approvals, and related records. Invoices stay unchanged. You cannot undo this action.
FAQs
Does Traqq support project management?
Yes. Traqq supports project management. You can create and manage projects, assign clients and team members, and track time, cost, and revenue.
Can I create multiple projects?
Yes. Workspace Owners and Admins can create multiple projects in a workspace and manage them at any time.
Can I assign more than one client to a project?
No. Each project can only be assigned to one client.
Can I assign multiple users to a project?
Yes. You can assign one or more team members to a project. You can also update or change access at any time.