Invoices
The Invoices section allows you to create invoices, import billable time, configure invoice defaults, and send invoices to clients.
To access invoices, open the Invoices section from the left sidebar.
The Invoices page contains three tabs:
- - Invoices
- Settings
- Email settings 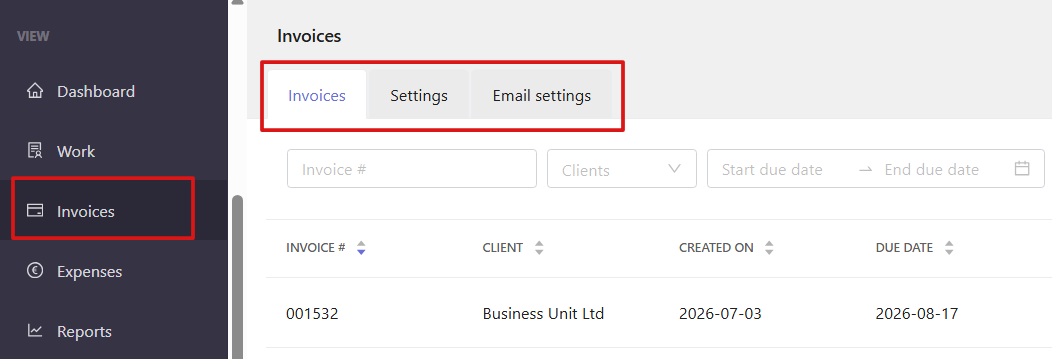
Invoices tab
The Invoices tab shows all created invoices in your workspace.
You can use filters to find invoices by:
- - Invoice number
- Client
- Date range
- Amount
- Paid amount
- Balance due
- Status 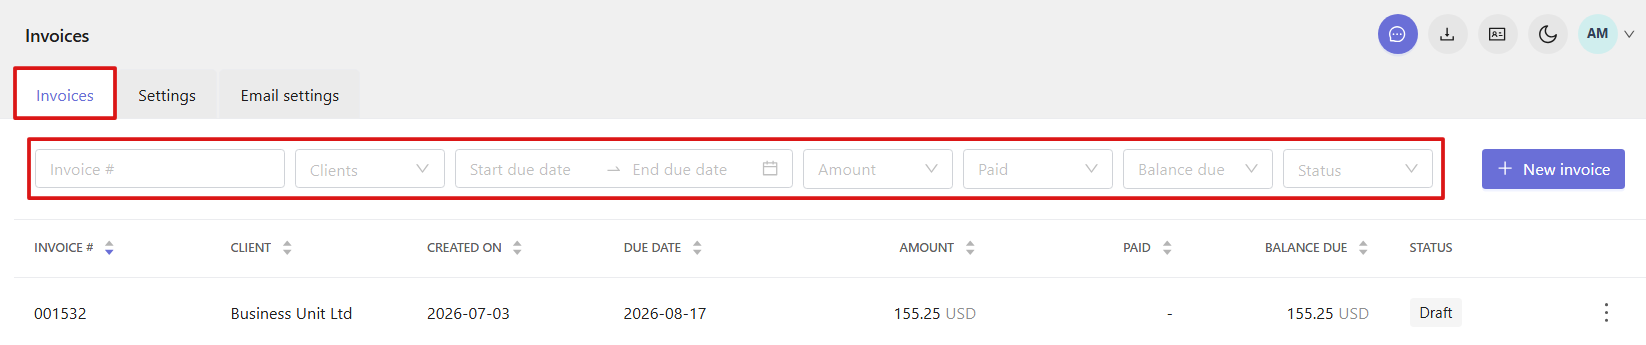
- The invoice list includes the following details:
- - Invoice number
- Client
- Created on
- Due date
- Amount
- Paid amount
- Balance due
- Status 
- Invoices may have the following statuses:
- Draft — the invoice is created but not yet sent.
Sent — the invoice has been sent to the client.
Paid — the full amount has been received.
Partially paid — only a portion of the invoice has been paid.
Overdue — the due date has passed and the invoice remains unpaid.
Void — the invoice has been canceled and is no longer valid.
Written off — the invoice is considered uncollectible and will not be paid. - Use the three-dot menu at the end of an invoice row to access additional actions:
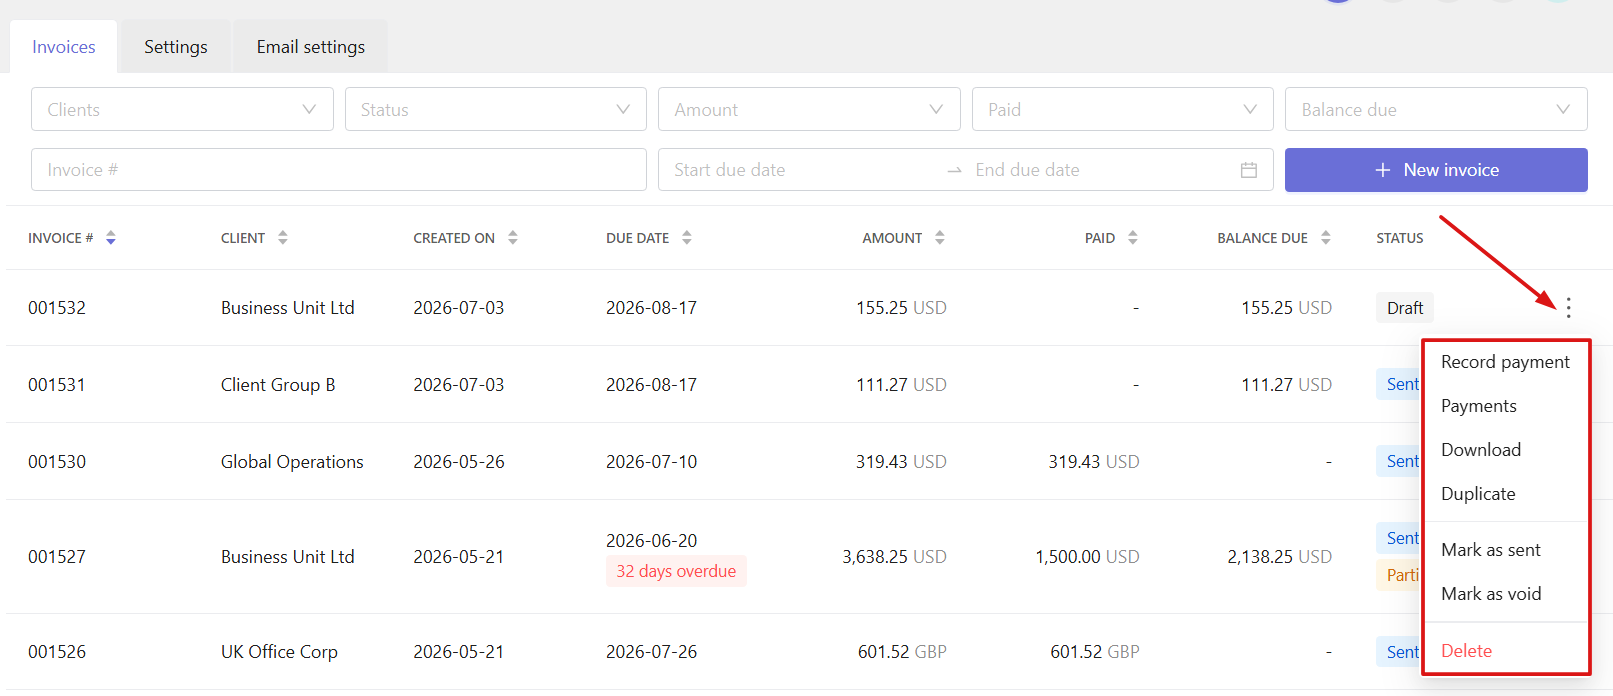
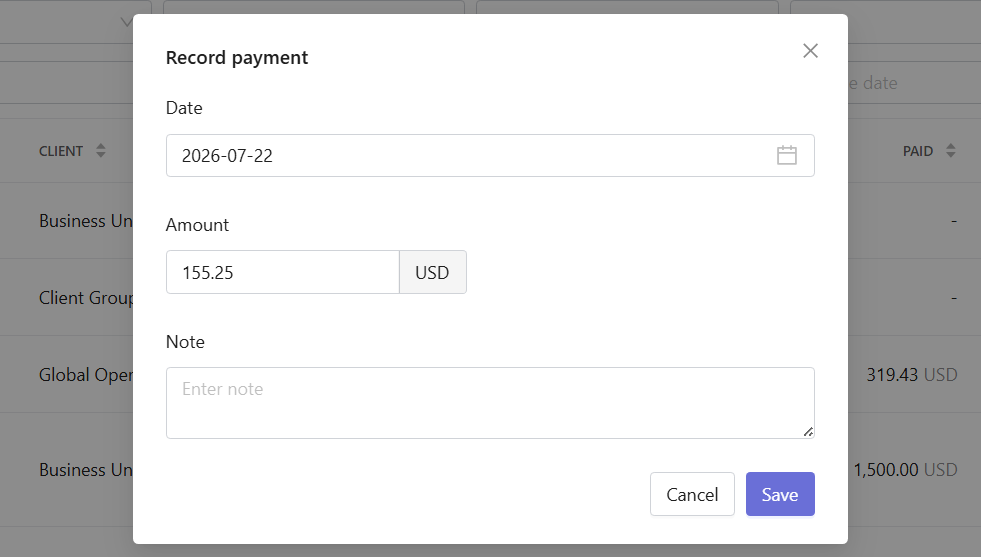
- - Record payment: Opens a window where you can enter the payment date, amount, and notes. After entering the details, click Save to add the payment.
- - Payments: Opens the payment history. You can also delete past payment records by clicking the trash icon.

- Download: Downloads the invoice as a PDF file.
- Duplicate: Creates a copy of the invoice with the Draft status.
- Mark as sent: Changes the invoice status to Sent.
- Mark as void: Changes the invoice status to Void.
- Mark as draft: Changes the invoice status to Draft.
- Delete: Opens a confirmation window. If you proceed, all time entries linked to this invoice will be unlinked and marked as uninvoiced/unpaid. All associated payment records will also be permanently removed.-
Create an invoice
- To create a new invoice, click New invoice in the top-right corner of the Invoices tab.

- In the window that opens:
- - Select a client
- Select the invoice currency
- Click Create 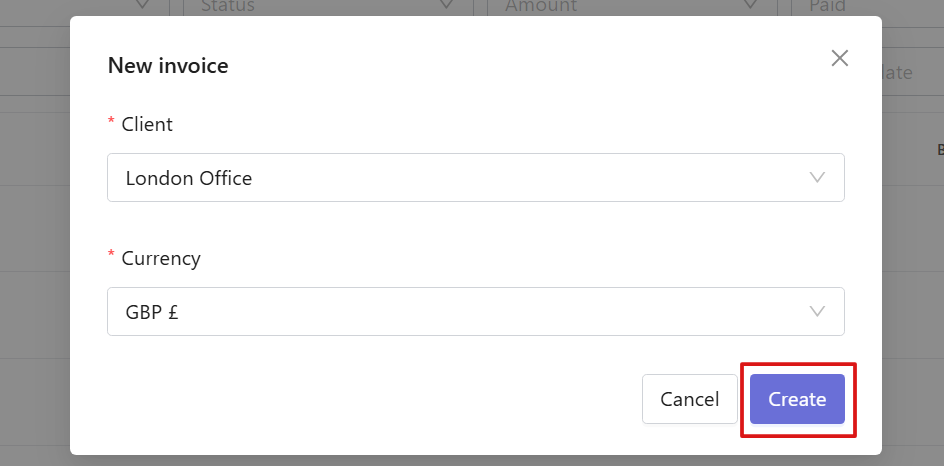
- After you click Create, you will be taken to the invoice page, where you can configure the invoice details and add invoice items.
-
Edit invoice details
- Click the Invoice number to open the invoice.

- Each invoice contains billing and payment information for a client. You can configure the following fields:
- - Invoice number
- Issue date
- Due date
- Client
- Currency
- Subject 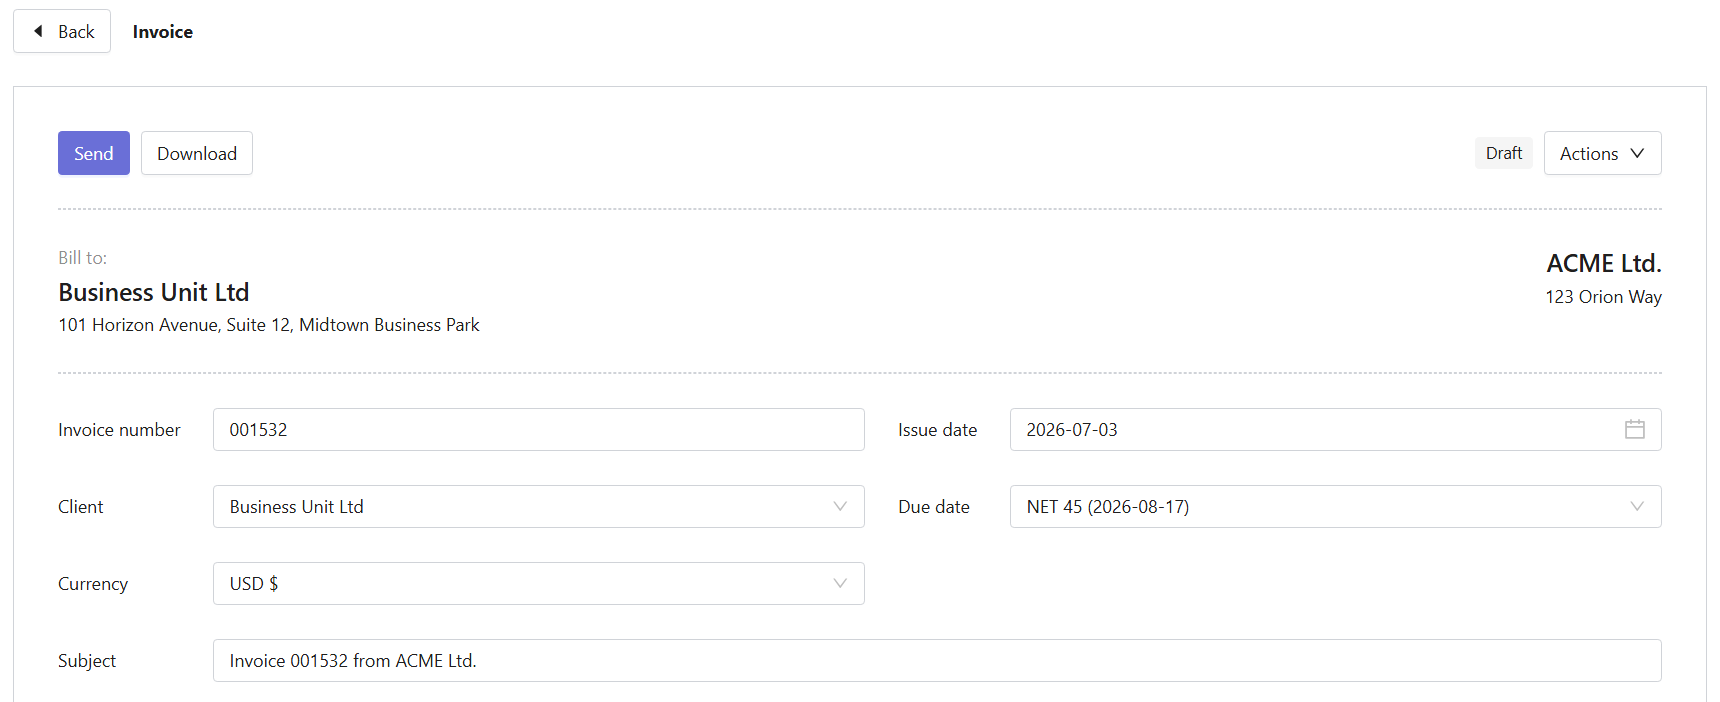
- The invoice also includes:
- Invoice items
- You can add invoice items manually or import tracked time automatically.
- To add a manual item, click Add new item and fill in the item details.

- To add tracked work data to an invoice, click Import time and expenses.

- In the window that opens:
- - Select one or more projects.
- Select the date range.
- Choose how time entries should be displayed in the invoice.
- Click Import. 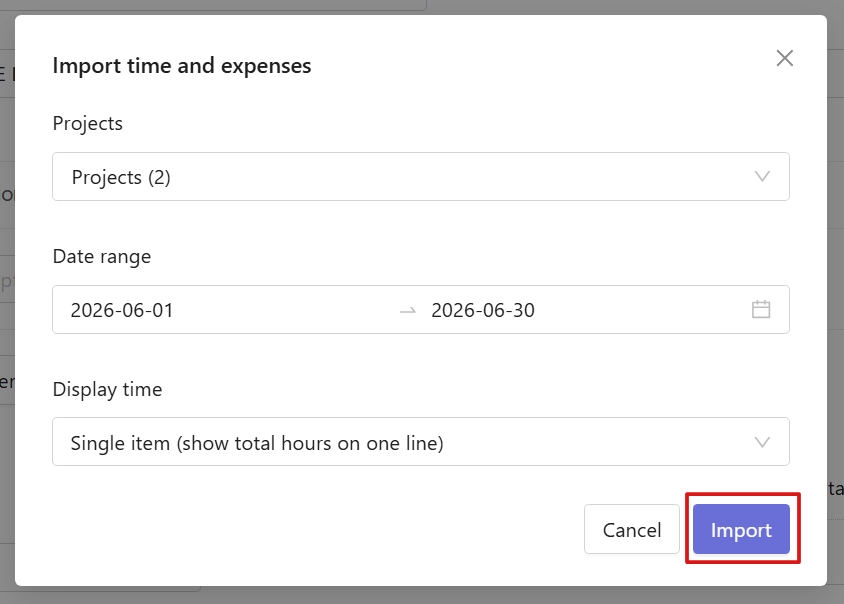
- Imported records are added to the invoice automatically.
- Each invoice item includes item type (Service or Product), description, quantity, unit price, amount, and tax values.
- You can delete invoice items by clicking the trash icon next to the item.

- Taxes and discounts
- Invoices support discounts and multiple taxes.
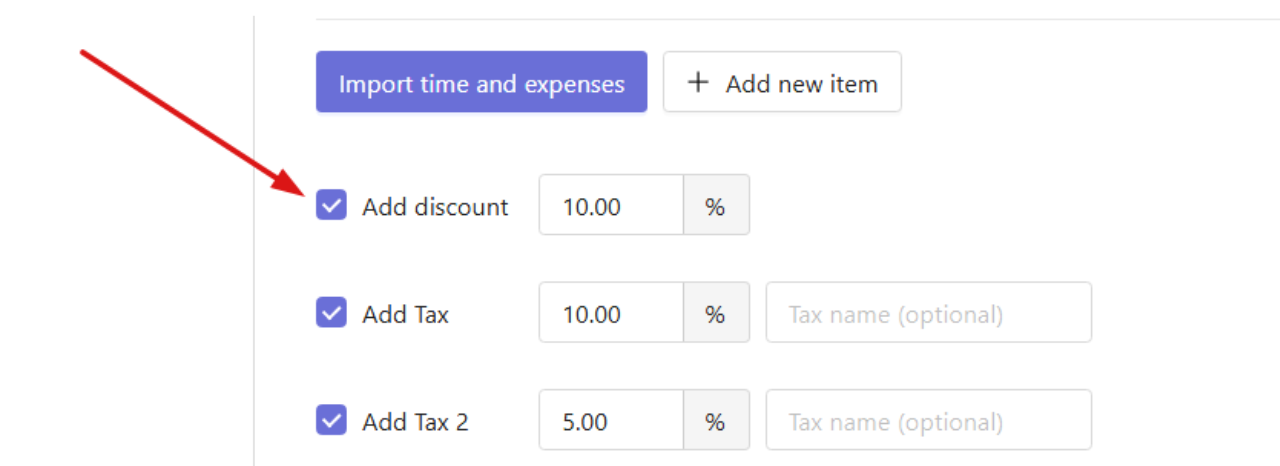
- To add a discount, enable the Add discount option and enter the discount percentage.
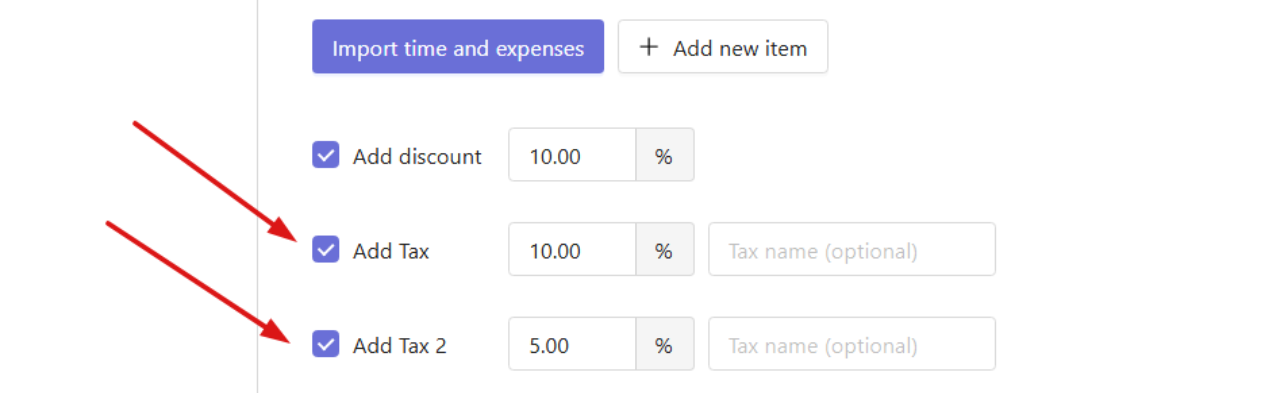
- To add taxes, enable Add Tax and Add Tax 2 if needed and enter the tax percentage.
- When two taxes are enabled, you can choose one of the following taxation modes:
Simple — both taxes are applied to the total amount separately.
Compound — the second tax is applied to the taxed amount. 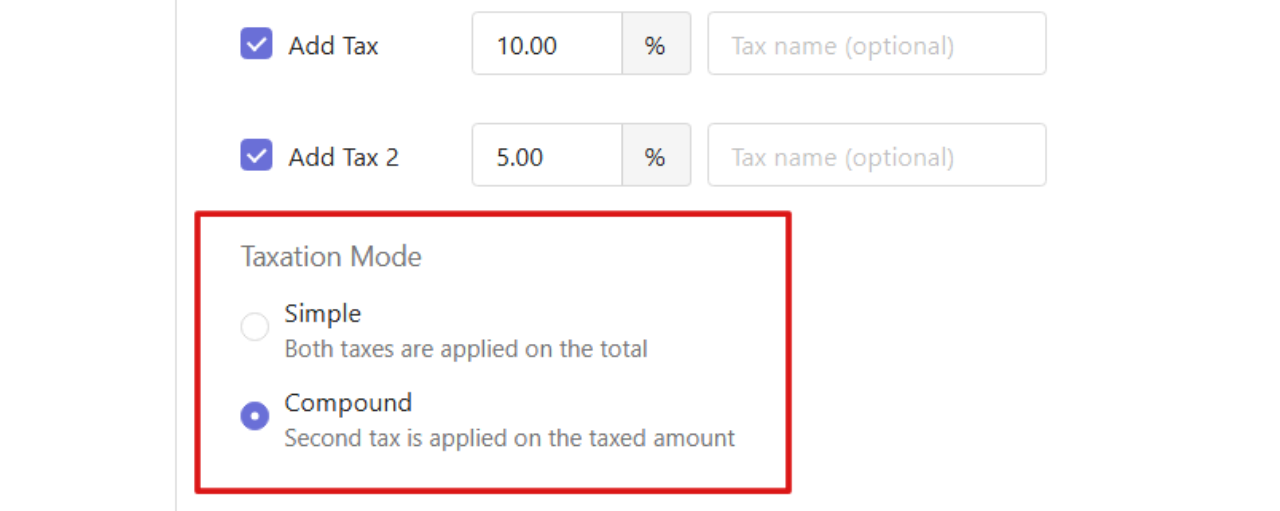
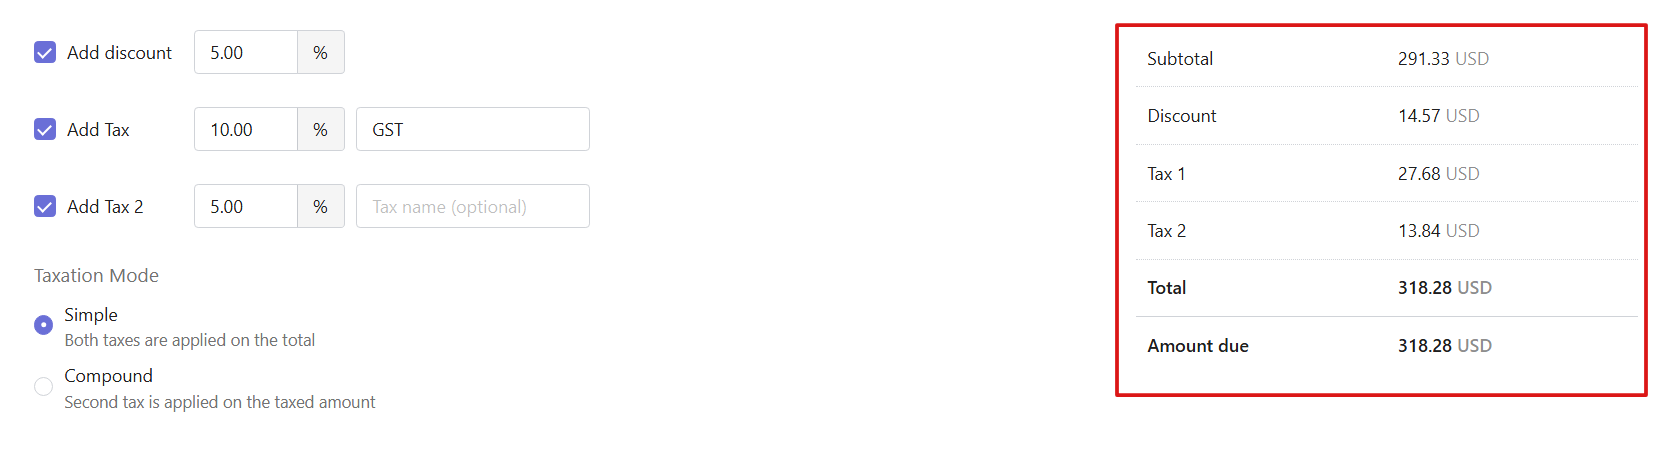
- Payment summary
- The payment summary displays the subtotal, discount and tax amounts, total amount, and amount due.
- Notes
- You can add custom notes to the invoice using the Notes field. Notes entered here are displayed directly on the invoice.

-
Invoice actions
- The Actions menu allows you to manage invoice status and payments.
- Available actions include:
- - Mark as void
- Mark as sent
- Record payment
- View payments
- Duplicate
- Delete 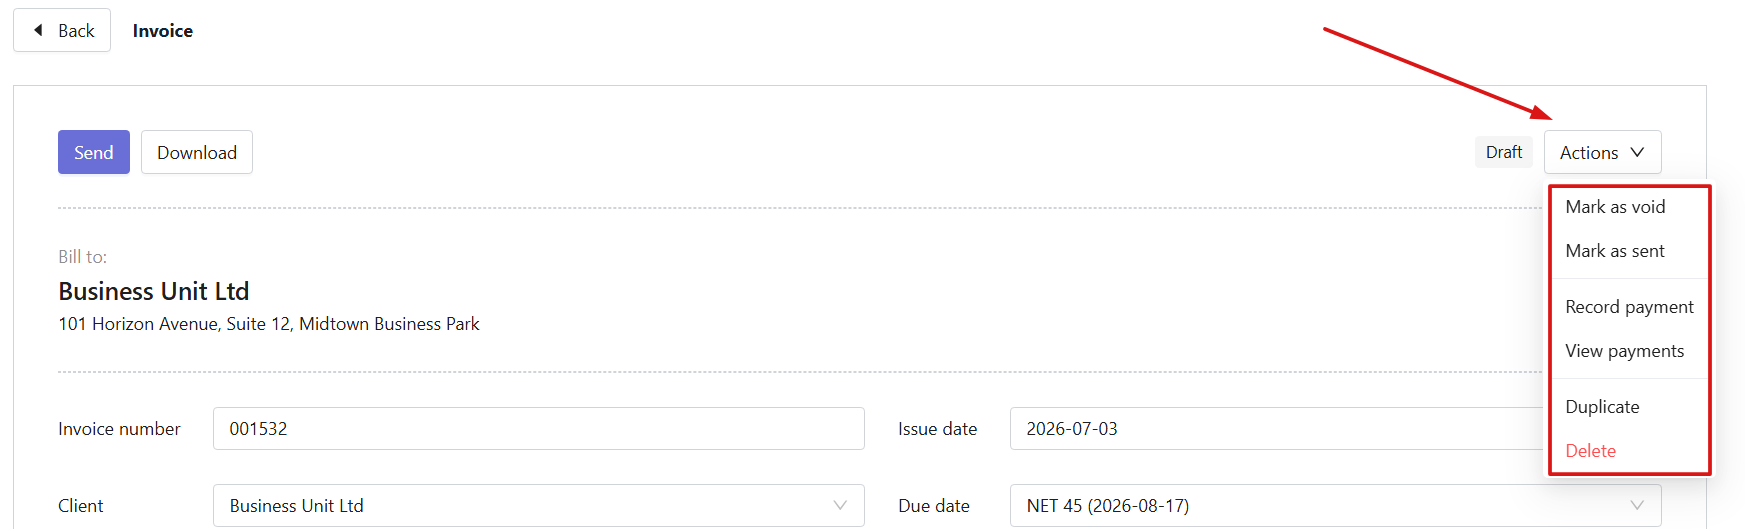
- You can also:
- - Send invoices to clients
- Download invoices 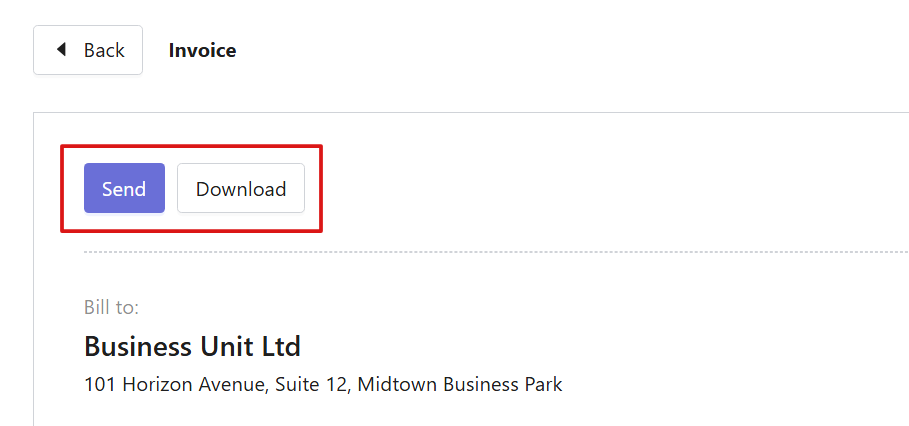
-
Settings tab
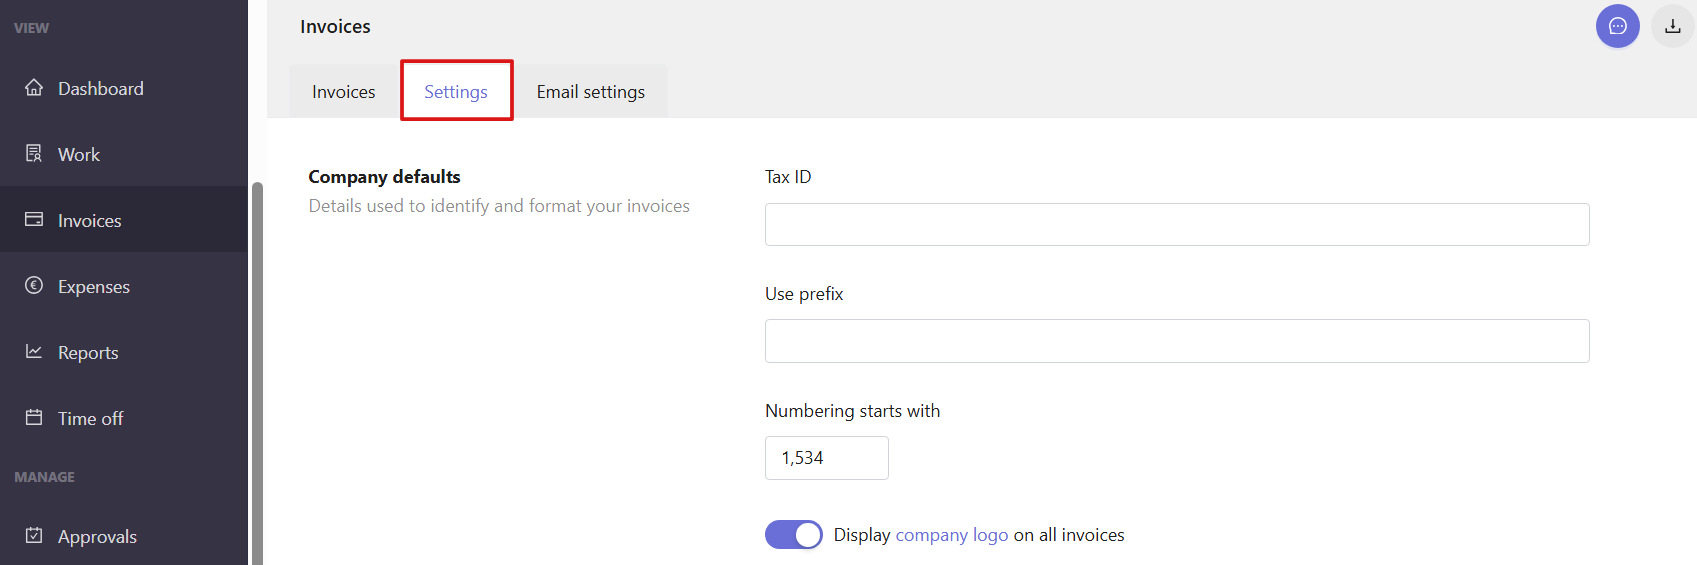
- The Settings tab contains default invoice configuration settings.
- You can configure company defaults used to identify and format invoices. Available settings include tax ID, invoice prefix, and starting invoice number.
- You can also enable the option to display the company logo on invoices.
- Invoice defaults are applied automatically to new invoices.
- You can configure:
- - Default due date rules
- Default taxes
- Taxation mode
- Default invoice subject
- Default invoice notes 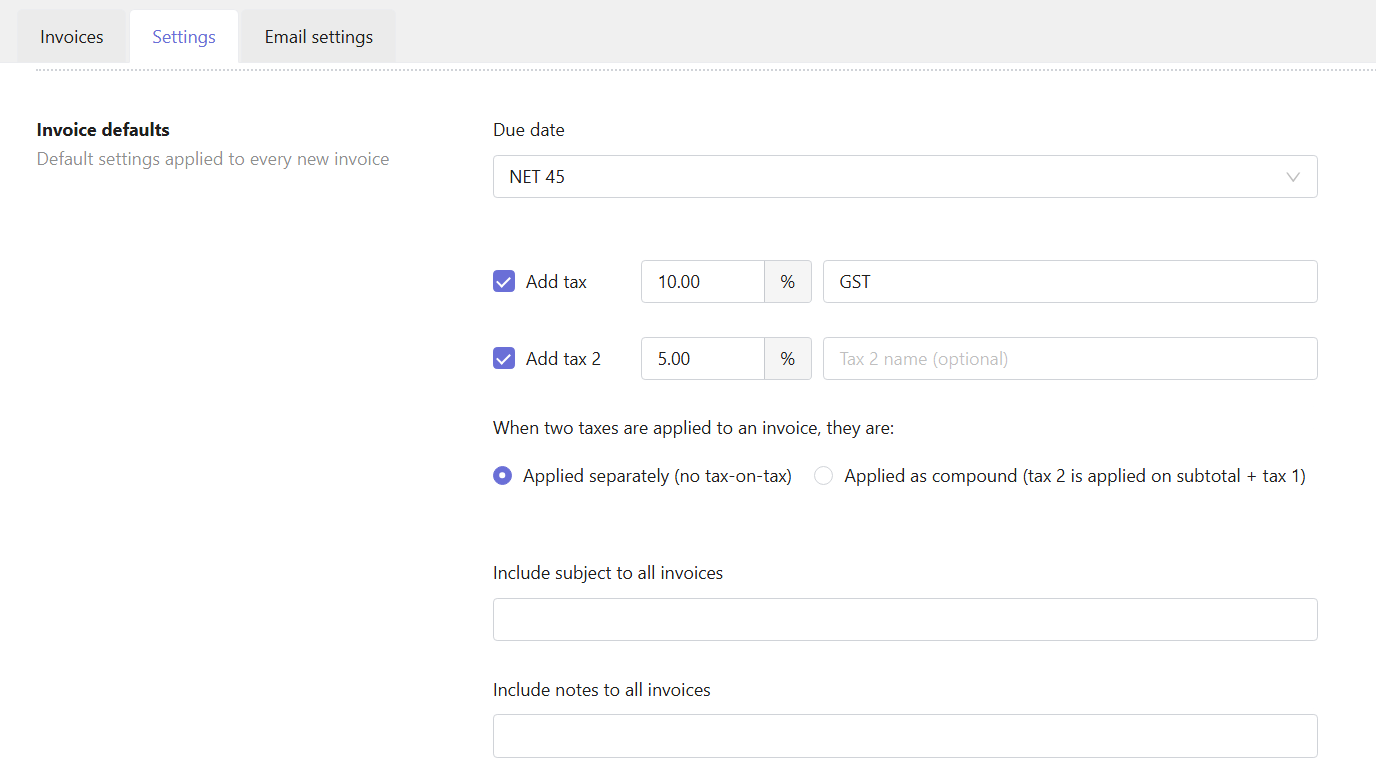
-
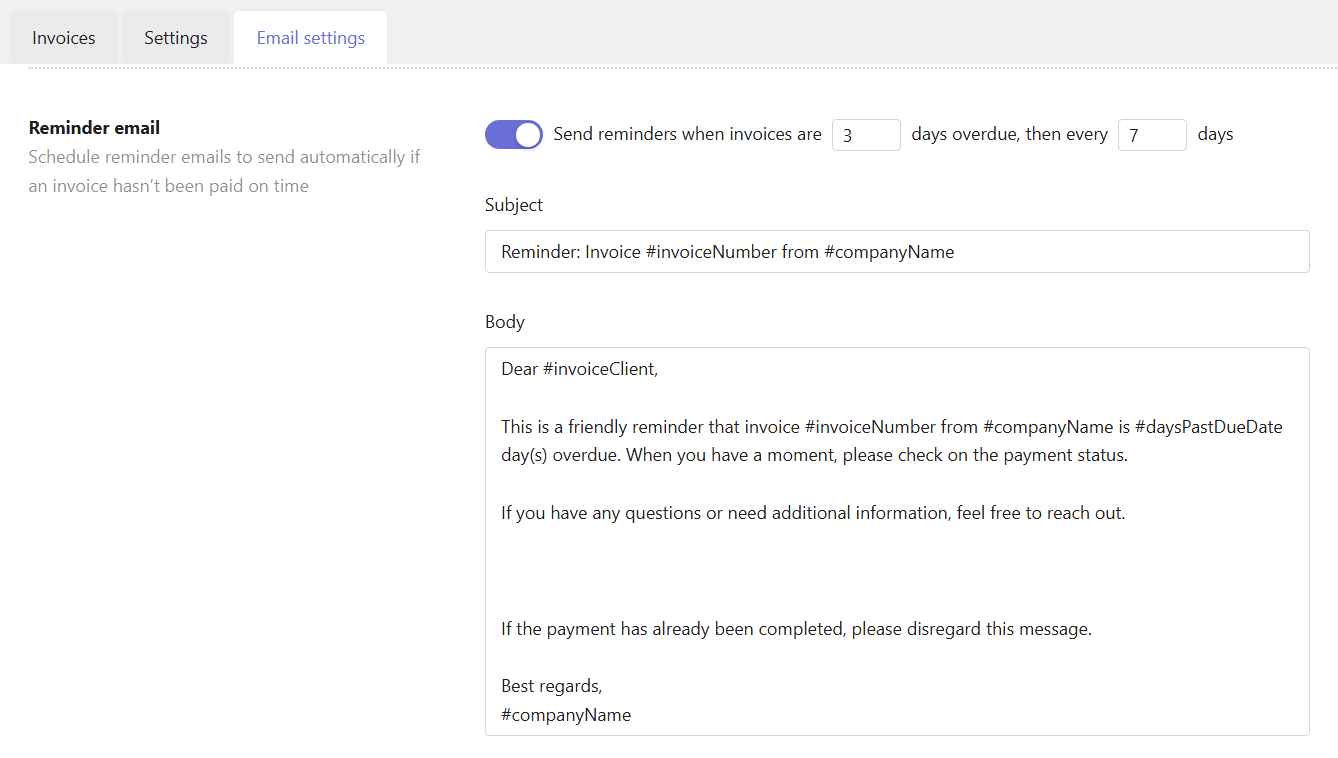
Email settings tab
- The Email settings tab allows you to customize invoice and reminder emails.
You can create email templates with placeholders that automatically insert invoice information. 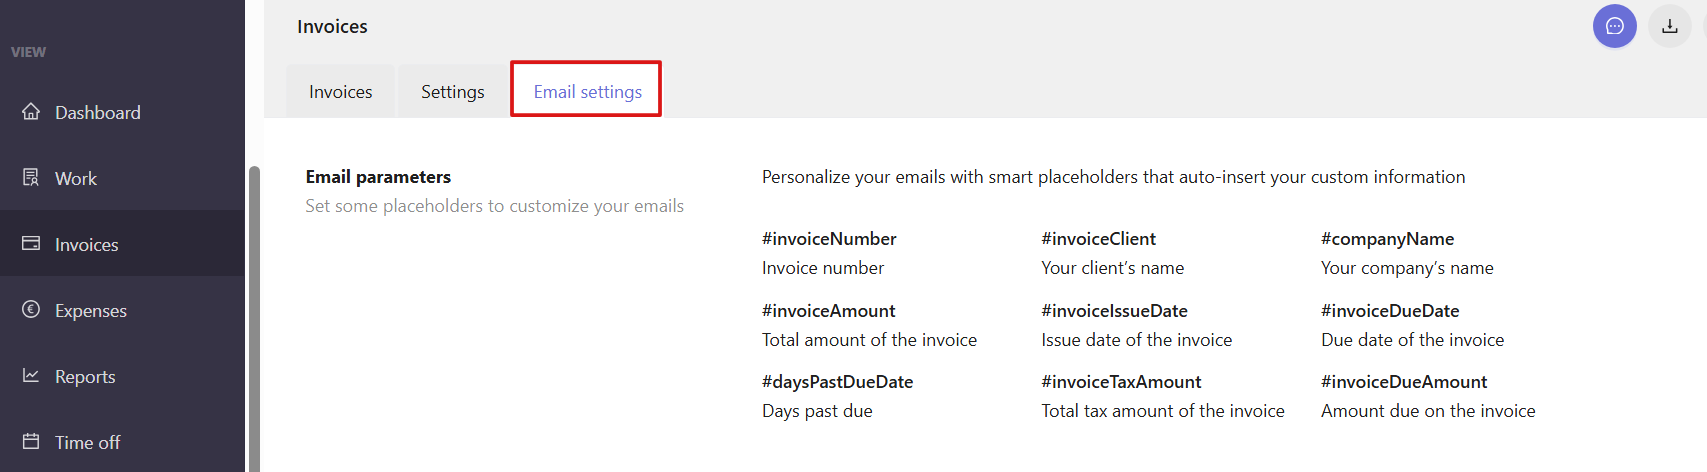
- The Invoice email section allows you to create invoice email templates.
You can configure email subject and body. 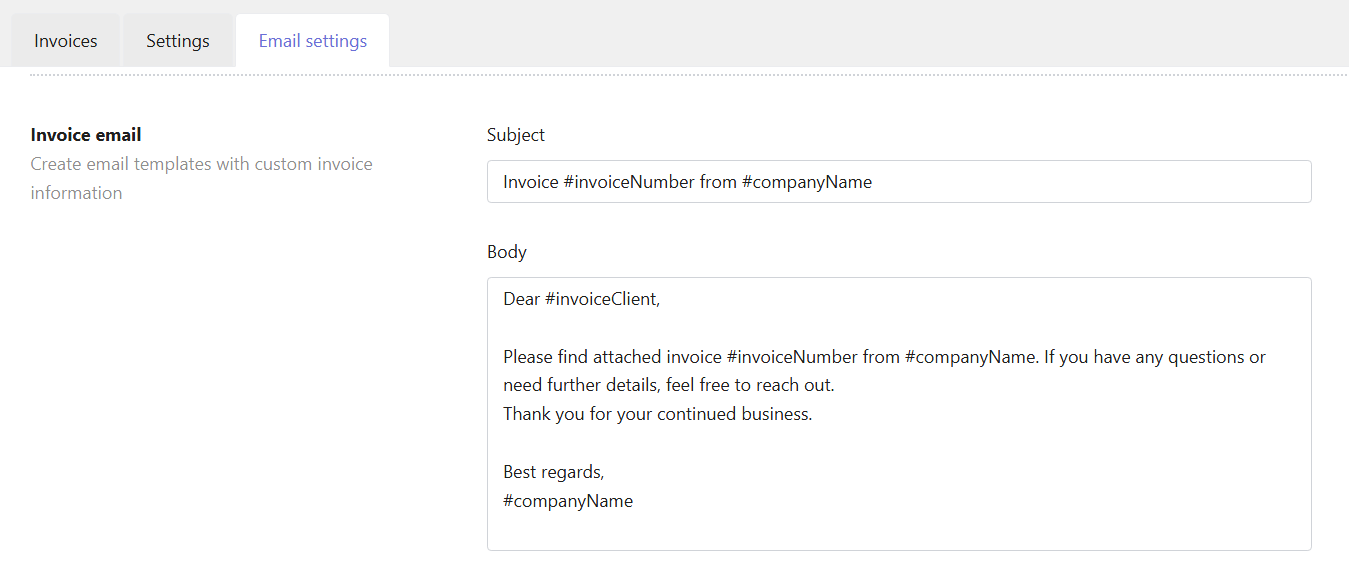
- The Reminder email section allows you to configure automatic reminders for overdue invoices.
- You can enable reminders and configure:
- Days overdue before sending the first reminder
- Reminder frequency in days
- Reminder email subject and body