Tracking time in Traqq
Traqq has three tracking modes: Timer, Break, and Manual.
- Timer lets you track time automatically. Click the Play button when you begin working, and Traqq will record the time until you stop the timer.
- Break is used to track break time.
- Manual lets you log time manually.
You can switch between Timer mode and Manual mode using the mode toggle. The timer icon indicates Timer mode, while the plus icon indicates Manual mode.

Timer mode
Before starting the timer, you can add details to the time entry:
- - Click the Task field and enter a task name.

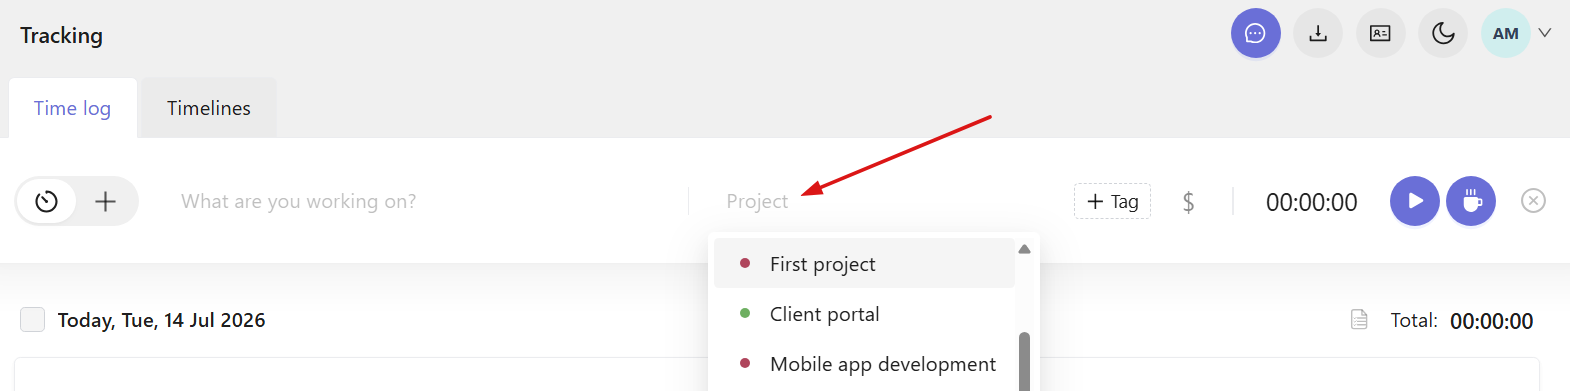
- - Click Project and select one of the available projects.
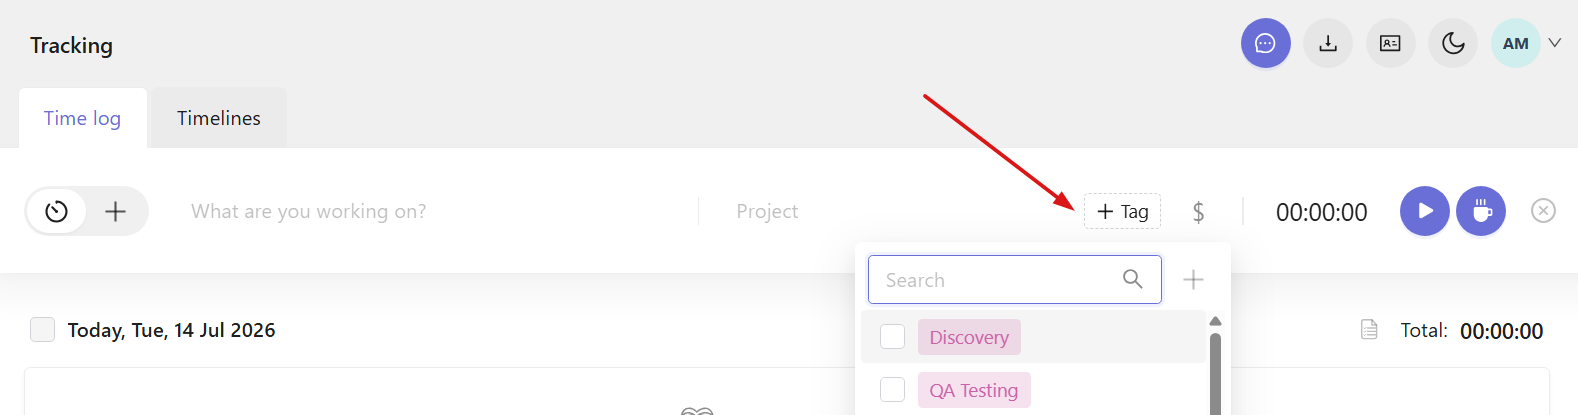
- - Click Tag and select one or more available tags. New tags can only be created by users with Admin or Owner permissions.
- - Click the dollar icon to switch between Billable and Non-billable. A blue icon indicates a billable entry, while a gray icon indicates a non-billable entry.

You can also add or change any of these details after the timer has started.
When you're ready, click the Play button to start tracking.

You can also click the Play button next to any existing task in the time log. Traqq will create a new active time entry using the same task name, project, tags, and billable status, so you do not need to enter the same information again.

Break mode
Use Break mode to track time spent on breaks.
To switch to Break mode, click the cup icon. You can add a task name, select a project and tags, and set the billable status if needed.

Time entries created in Break mode show a cup icon before the task name in the time log.

Note: If you cannot see the cup icon, it means break tracking is disabled for your workspace. Owners can enable this feature in Workspace settings. See this article to learn more about setting up your workspace.
Manual mode
Manual mode lets you create a time entry without starting the timer.
To switch to this mode, click the plus icon in the mode toggle. Enter the date, time, task name, project, tags, and billable status, then click Add.

A notification saying "Time entry has been created" will appear, and the entry will be added to the time log.
Time entries created manually are marked with a pencil icon.

Editing time entries
You can edit both automatically tracked and manually created time entries, including entries from previous days.
You can change:
Task name — click the task field and enter a new name. If no task name has been added yet, simply click the field and type one.
Project — click the project field and select a different project from the list. To remove the current project, hover over its name and click the × icon.
Tags — click the Tag field to add or remove tags.
Billable status — click the dollar icon to switch between billable and non-billable.
Date — click the calendar icon and select a different date.
Time or duration — click the displayed value and enter the correct time.
After making changes, a notification saying "Time entry has been updated" will appear.
Edited entries are marked with a pencil icon in the time log.
Pin tasks
You can pin frequently used tasks for quick access.
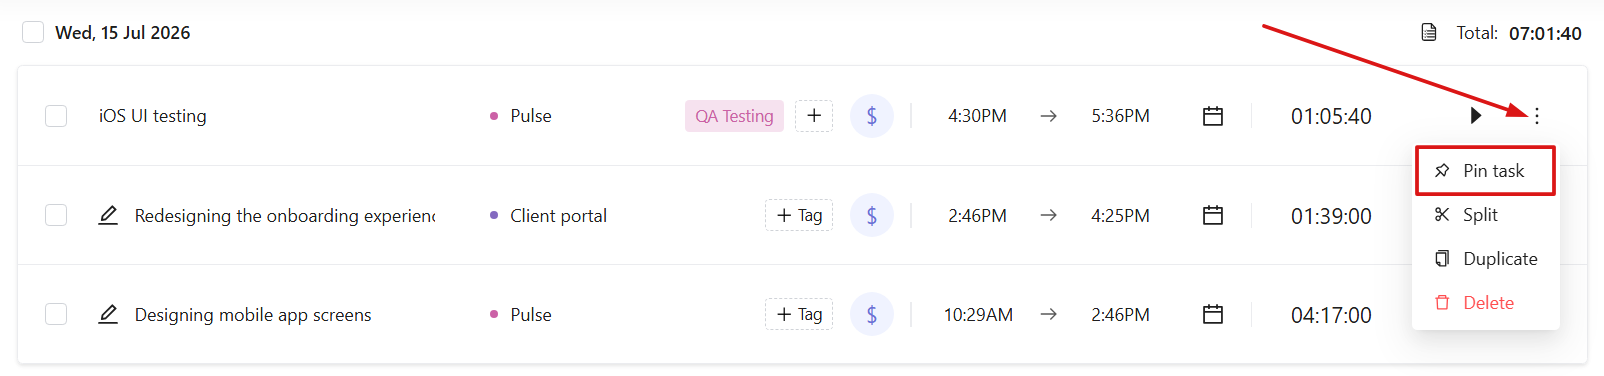
To pin a task, click the three-dot menu next to the task and select Pin task.
To view your pinned tasks, click the pin icon next to the task field.

From the pinned tasks list, you can:
- - Change the task details.
- Click the Play button to start tracking the task.
- Reorder tasks by dragging the six-dot icon.
- Unpin a task by clicking the red pin icon next to it. 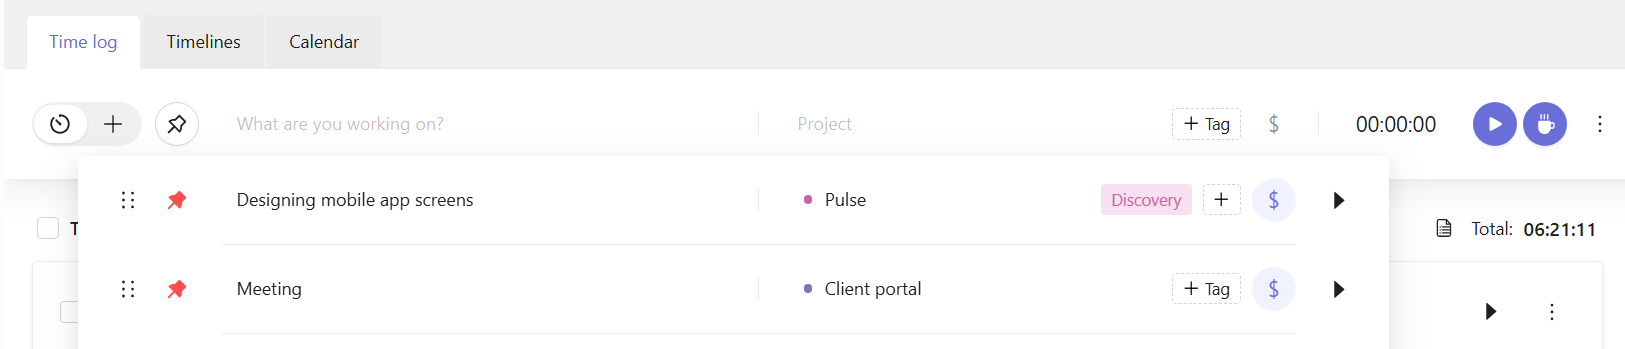
More actions
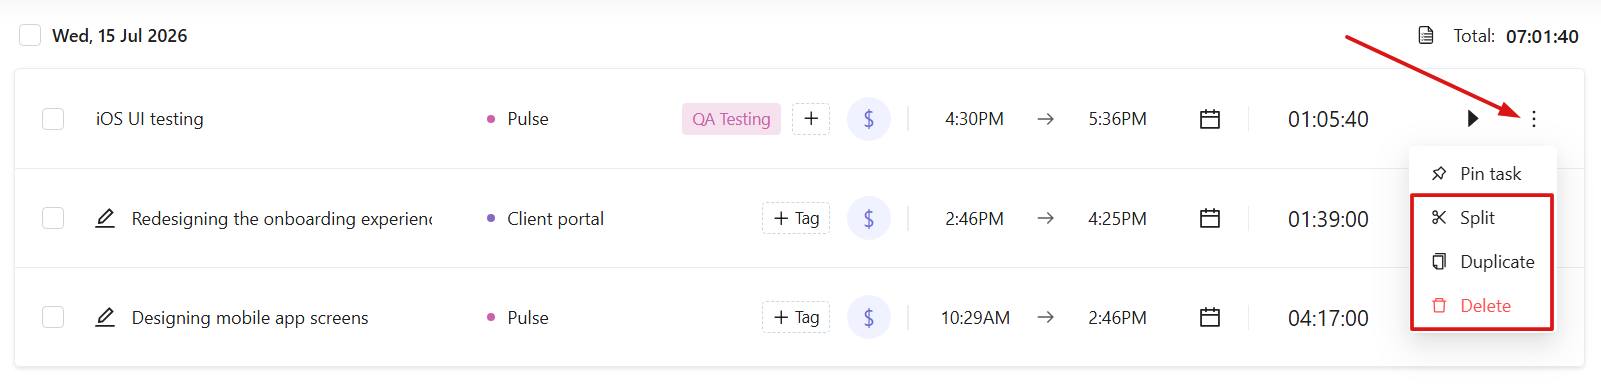
Click the three-dot menu next to a time entry to access additional actions:
Split — divides a time entry into two separate entries at the selected point. This is useful when only part of a time entry needs to be corrected or removed.
Duplicate — creates a copy of the time entry with the same details.
Delete — removes the time entry from the time log.
Grouped time entries
Time entries with the same task name, project, tags, and billable status are automatically grouped together in the time log.
Expand a group to view the individual time entries it contains.

Approved time entries
When Timesheets are enabled in your workspace, tracked and manually added time entries automatically appear in your timesheet.
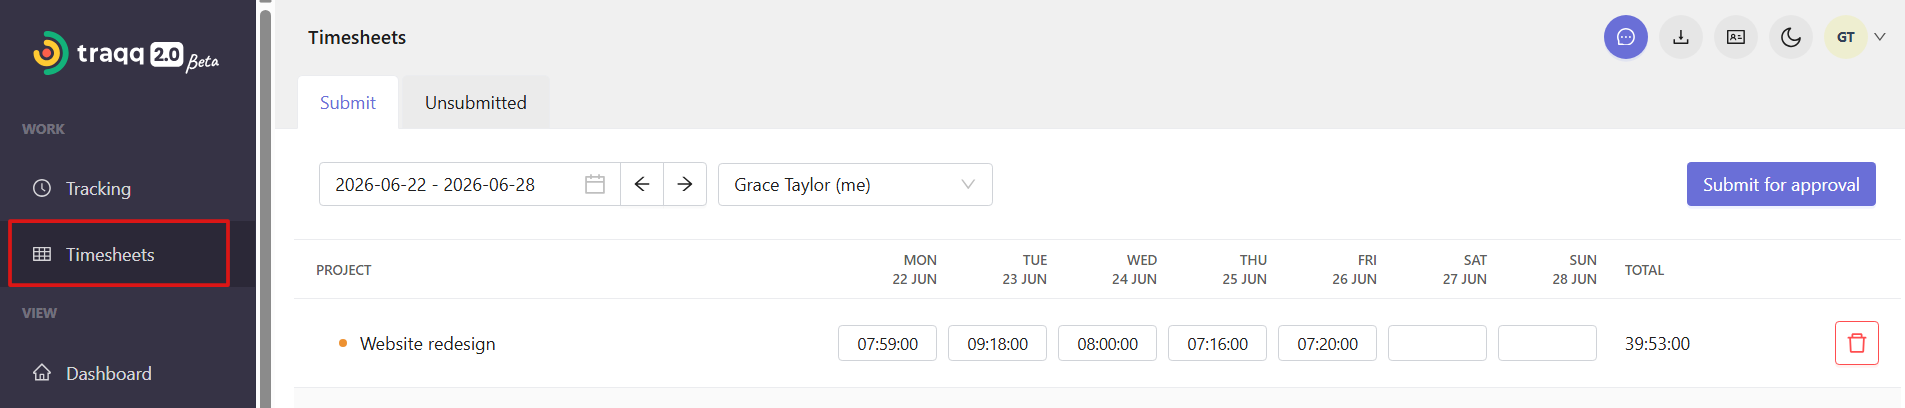
Time entered directly into a timesheet is also added to your Time log.
After a timesheet is approved, its time entries are locked and cannot be edited. A lock icon appears next to each approved entry.
