Scheduled Reports
Generate your report by selecting the people and time period for the report.
Step 1
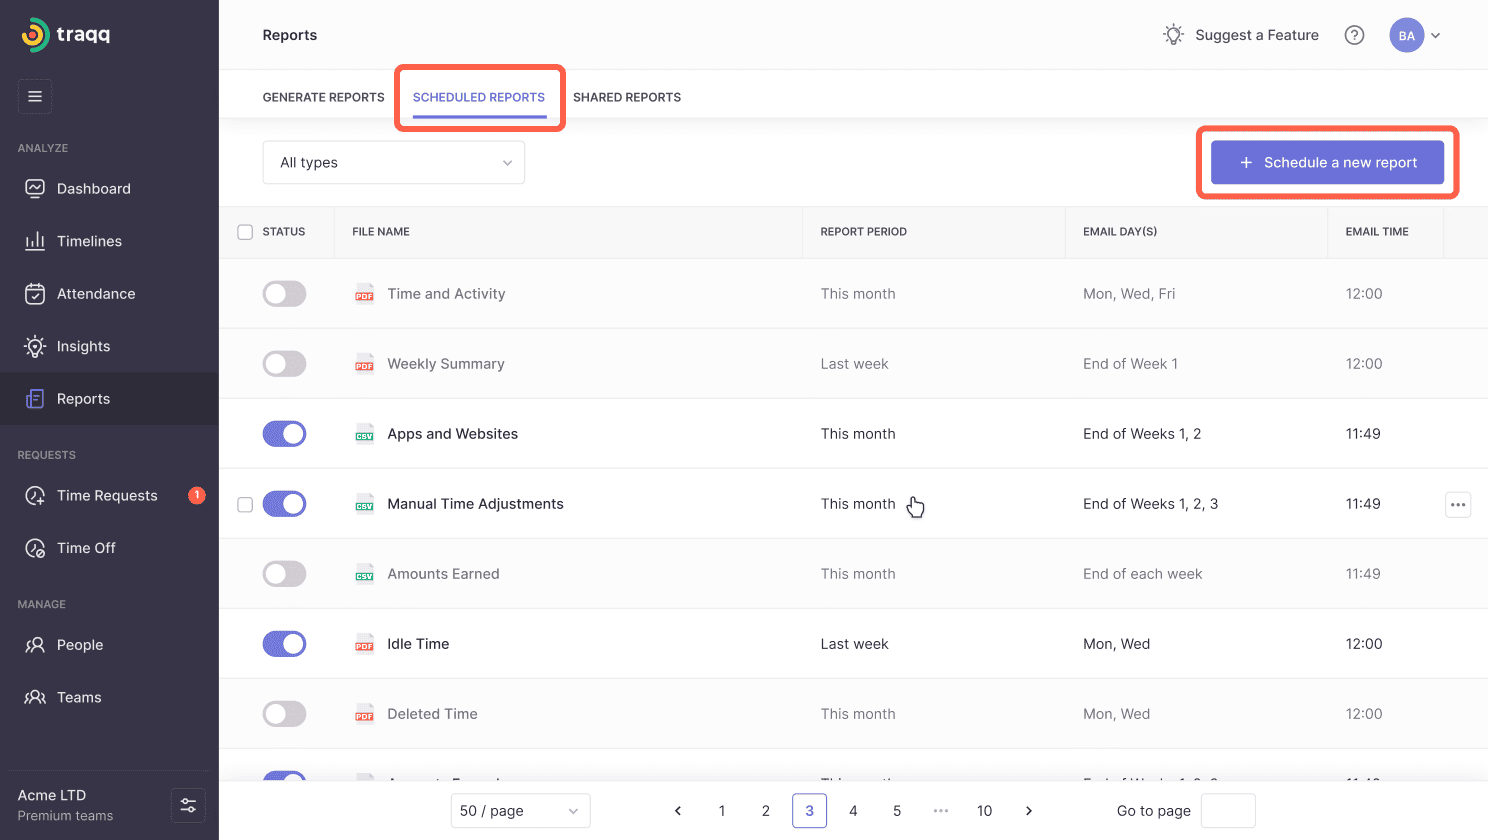
Click on ‘Scheduled report’ on the Reports tab. Here you can see the list of previously scheduled reports and create new ones by clicking on the ‘+Schedule a new report’ button.
Step 2
Choose the report type and view.
Step 3
Choose users or teams to include on your report.
.png)
Step 4
Select the reporting period.
Step 5
Select the format for your report.
Step 6
Choose the time to schedule the report for and click on SAVE. Note that the time for emailing the report is set using the organization’s time zone.
Step 7
To edit scheduled reports, click the three dots at the end of the report’s line and choose Edit from the menu that appears.
Step 8
To delete a scheduled report, click the three dots at the end of the report’s line and choose Delete from the menu that appears. You may also delete multiple reports at once by checking the boxes next to them and clicking the Delete link that appears at the bottom of the page.
.png)
Step 9
Instead of deleting your report, you may now simply pause it. Flip the toggle next to the report to the OFF position to temporarily stop it from being sent. To re-enable the report, just flip the toggle back to ON.
.png)

.png)
.png)
.png)
.png)
.png)